

Save Form Uploads to Your Own Google Drive
By default, files uploaded through Forms Plugin upload fields are stored on our hosted storage. If you’d rather keep every uploaded file inside your own Google Drive, this guide walks you through the one-time setup. It applies to all six upload-type fields:- File Upload
- Image Upload
- Audio Upload
- Video Upload
- Voice Upload
- Signature
What you’ll need - A Google account. Setup takes about 10 minutes and only needs to be done once. After that, every file submitted through any of these fields lands directly in your Drive folder, organized into clean subfolders.
Step 1 - Create a Google Drive Folder
This folder will become the home for every file uploaded through your forms.- Go to drive.google.com and sign in with your Google account
- Right-click any empty area, choose New folder, name it something like
FormsPlugin Uploads, then click Create - Open the folder and copy the full URL from your browser’s address bar
Step 2 - Create the Apps Script
The Apps Script is a small piece of code that runs under your own Google account. It receives files from your form and saves them to the Drive folder you just created.2.1 - Open Google Apps Script
Go to script.google.com and click New project.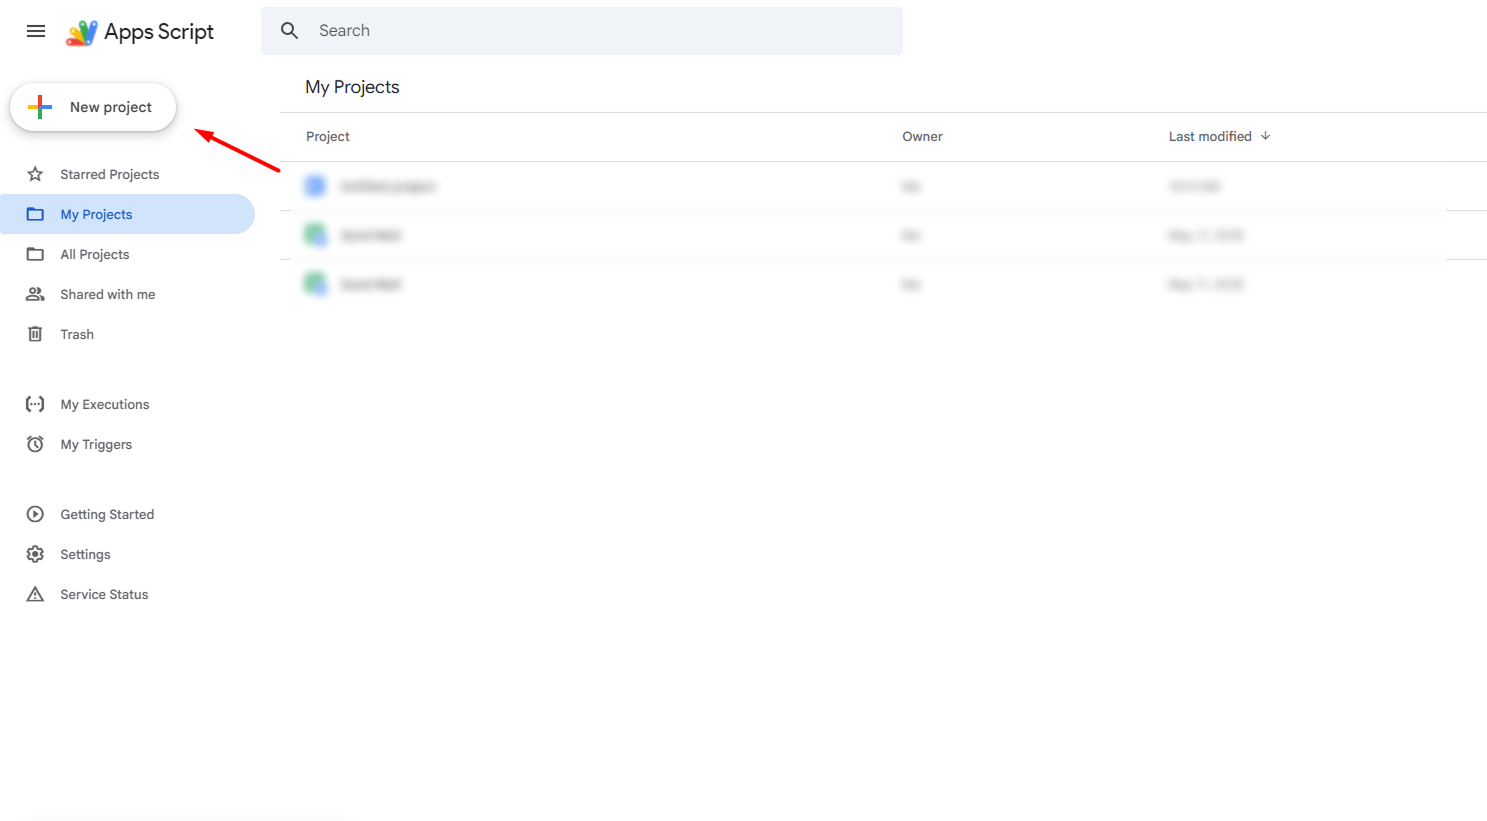
2.2 - Paste the Script
Select all the existing code in the editor and delete it. Then paste the script below.The script is provided by Forms Plugin and is safe to use. It only runs on your own Google account and writes files to the folder you choose.
Google Apps Script
2.3 - Edit the Three Config Lines
At the top of the script you’ll see a CONFIG block with three values. Update each one as described below.ROOT_FOLDER_URL - Replace the placeholder URL with the Google Drive folder URL you copied in Step 1.
ALLOWED_ORIGINS - This is your safety net. Only the websites listed here are allowed to upload files to your Drive. List every domain where your form is published, including the Framer subdomain and any custom domain.
ABSOLUTE_MAX_SIZE_MB - The largest file size (in MB) your script will accept. The default value of 25 is a safe choice.
2.4 - Save the Project
Press Ctrl + S (or Cmd + S on Mac). Give the project a name likeFormsPlugin Upload and click Rename.
2.5 - Deploy as a Web App
Now you’ll publish the script so your form can talk to it.- Click Deploy at the top-right, then New deployment
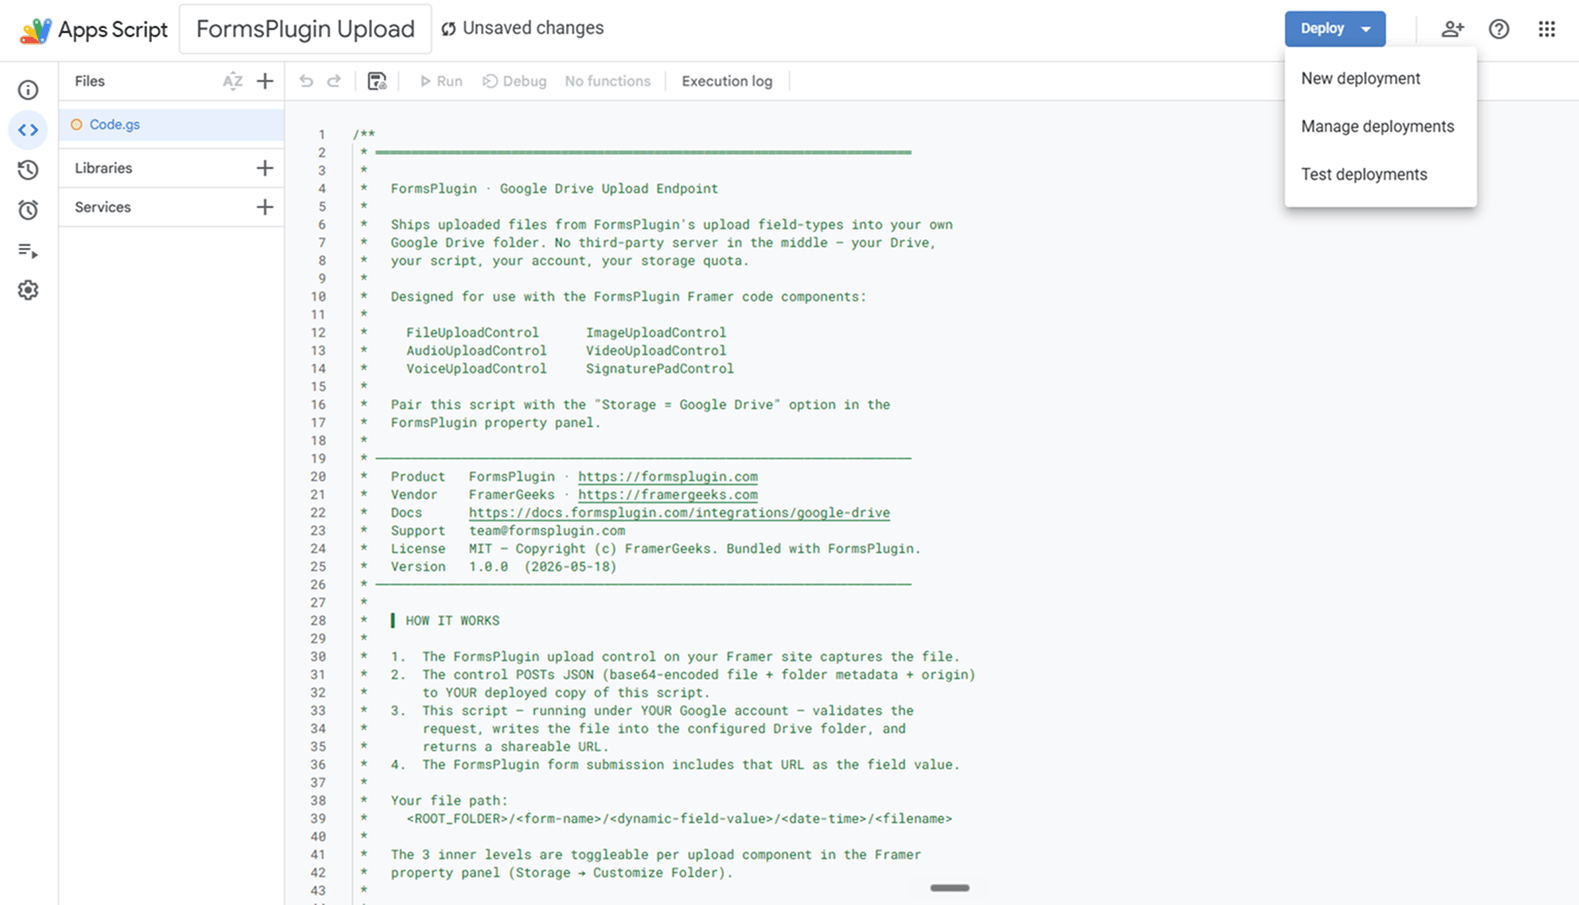
- Click the gear icon next to Select type and choose Web app
- Fill in the form:
- Description:
FormsPlugin Upload v1(anything you like) - Execute as:
Me(your Google account) - Who has access:
Anyone
- Description:
- Click Deploy
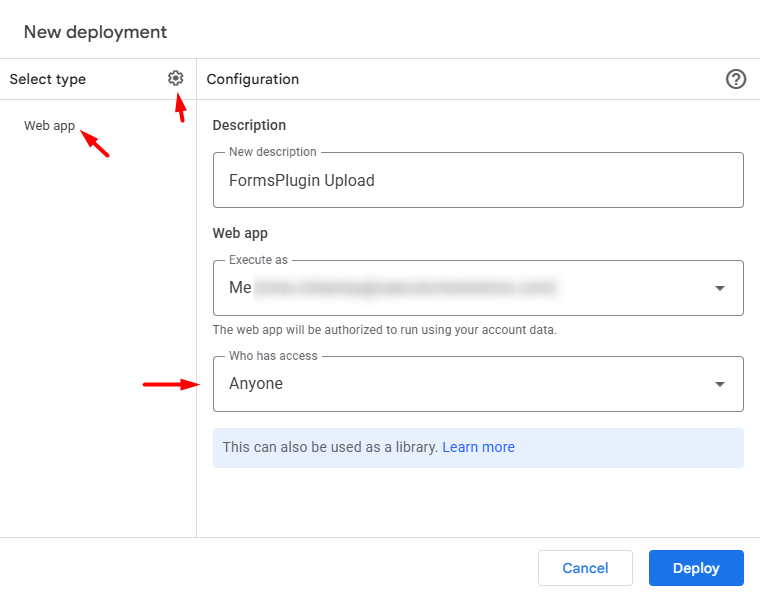
You may see a warning that says “This app isn’t verified.” This is normal because the script is your own private deployment. Click Advanced, then Go to [your project] (unsafe), and finally Allow to give the script permission to save files to your Drive.
2.6 - Copy the Web App URL
After deploying, Google will show you a Web app URL that looks like this: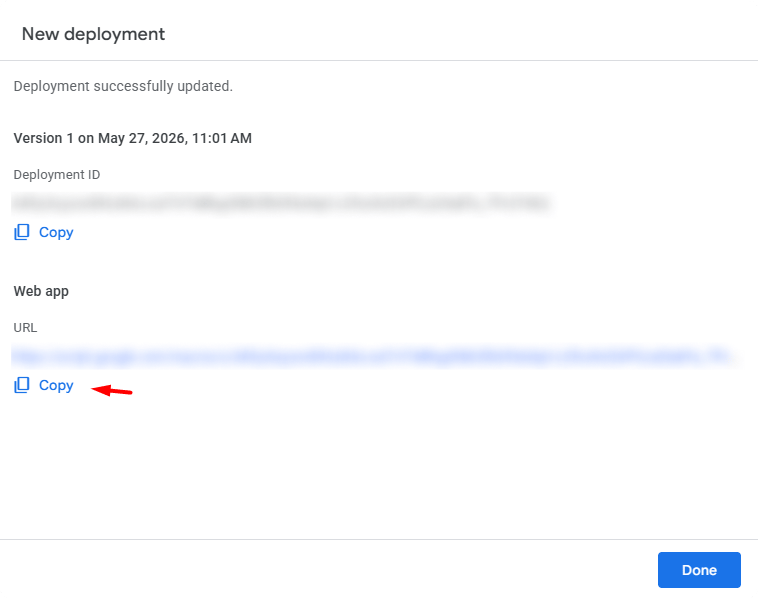
Step 3 - Connect Forms Plugin to Your Drive
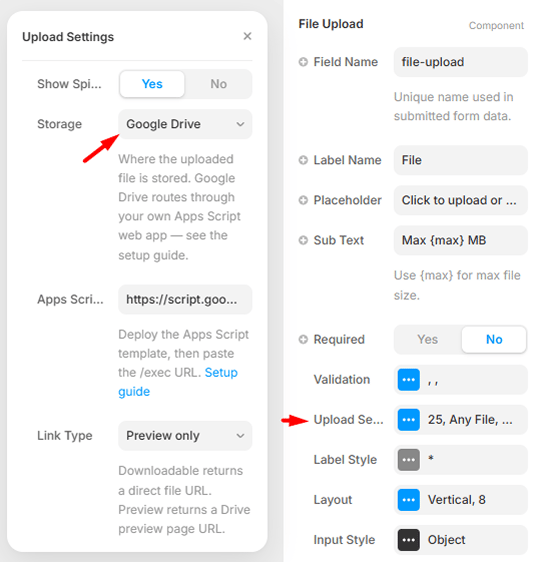
Now switch back to Framer. Select any upload field on your canvas (File Upload, Image Upload, Audio Upload, Video Upload, Voice Upload, or Signature) and open the Upload Settings panel on the right.3.1 - Switch Storage to Google Drive
Find the Storage option and change it to Google Drive. New fields will appear below it.3.2 - Paste the Apps Script URL
In the Apps Script URL field, paste the/exec URL you copied at the end of Step 2.
3.3 - Choose the Link Type
This controls what kind of link your form submission will contain after a file is uploaded.- Downloadable - Returns a direct file URL. Clicking it downloads the file straight to the visitor’s device.
- Preview only - Returns a Google Drive preview page URL. Visitors view the file inside Drive without downloading.
3.4 - (Optional) Customize the Folder Structure
By default, every file lands inside your root folder under a subfolder named after the form. If you want more control, toggle Customize Folder to On. The following extra settings will appear.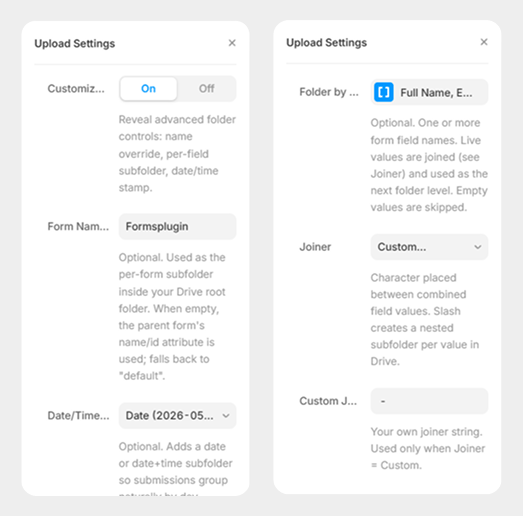
Folder by Field - Click the
{ } token picker and select one or more form fields from your form (like Full Name or Email). The live values entered by the visitor at submission time are joined together and used as the next folder level. Empty values are skipped automatically.
Joiner - If you list more than one field above, this controls the character placed between their values.
3.5 - Example Folder Path
With all customization options on, a file uploaded to a contact form might land here:Re-Deploying After Edits
If you ever edit the script (for example to add a new domain toALLOWED_ORIGINS), saving the editor alone is not enough. You must create a fresh deployment for the changes to go live.
- In the Apps Script editor, click Deploy then New deployment
- Choose Web app again
- Click Deploy and Done
/exec URL stays the same, so no changes are needed in Framer.
How Your Files Stay Safe
- The
/execURL is public by design, but the Allowed Origins list blocks any website that isn’t on your approved list - The script always enforces the Absolute Max Size even if a tampered request claims something different
- File names and folder names are automatically cleaned of special characters that could break the folder structure
- Your Google account credentials never leave Google, the script runs as you on Google’s servers and the visitor’s browser only ever sees the public
/execURL
Things to Keep in Mind
- The maximum file size per upload is 25 MB. This limit is enforced both on the Forms Plugin component and inside the script.
- Google Drive’s daily upload and bandwidth quotas apply, the same limits as your regular Drive usage.
- Files are saved with Anyone with the link can view sharing so the URL embedded in your submission email is openable. Change this on individual files in Drive if needed.
Next Steps
- File Upload Field - Learn how the File Upload field works end to end
- Advanced Fields - Browse the other advanced upload fields
- Integrations Overview - See all available Forms Plugin integrations