> ## Documentation Index
> Fetch the complete documentation index at: https://formsplugin.com/docs/llms.txt
> Use this file to discover all available pages before exploring further.
# Klaviyo
> Connect Klaviyo with Framer Forms using the Forms Plugin to automatically add form submissions to your Klaviyo profiles.
# Connect Klaviyo with Framer Forms
Capture leads from your Framer forms and automatically add them to your Klaviyo profiles using the Forms Plugin.
***
## Step 1 - Get Your Klaviyo API Key
Before connecting Klaviyo to your form, generate an API key from your Klaviyo account. This API key allows the Forms Plugin to securely send form submissions to Klaviyo.
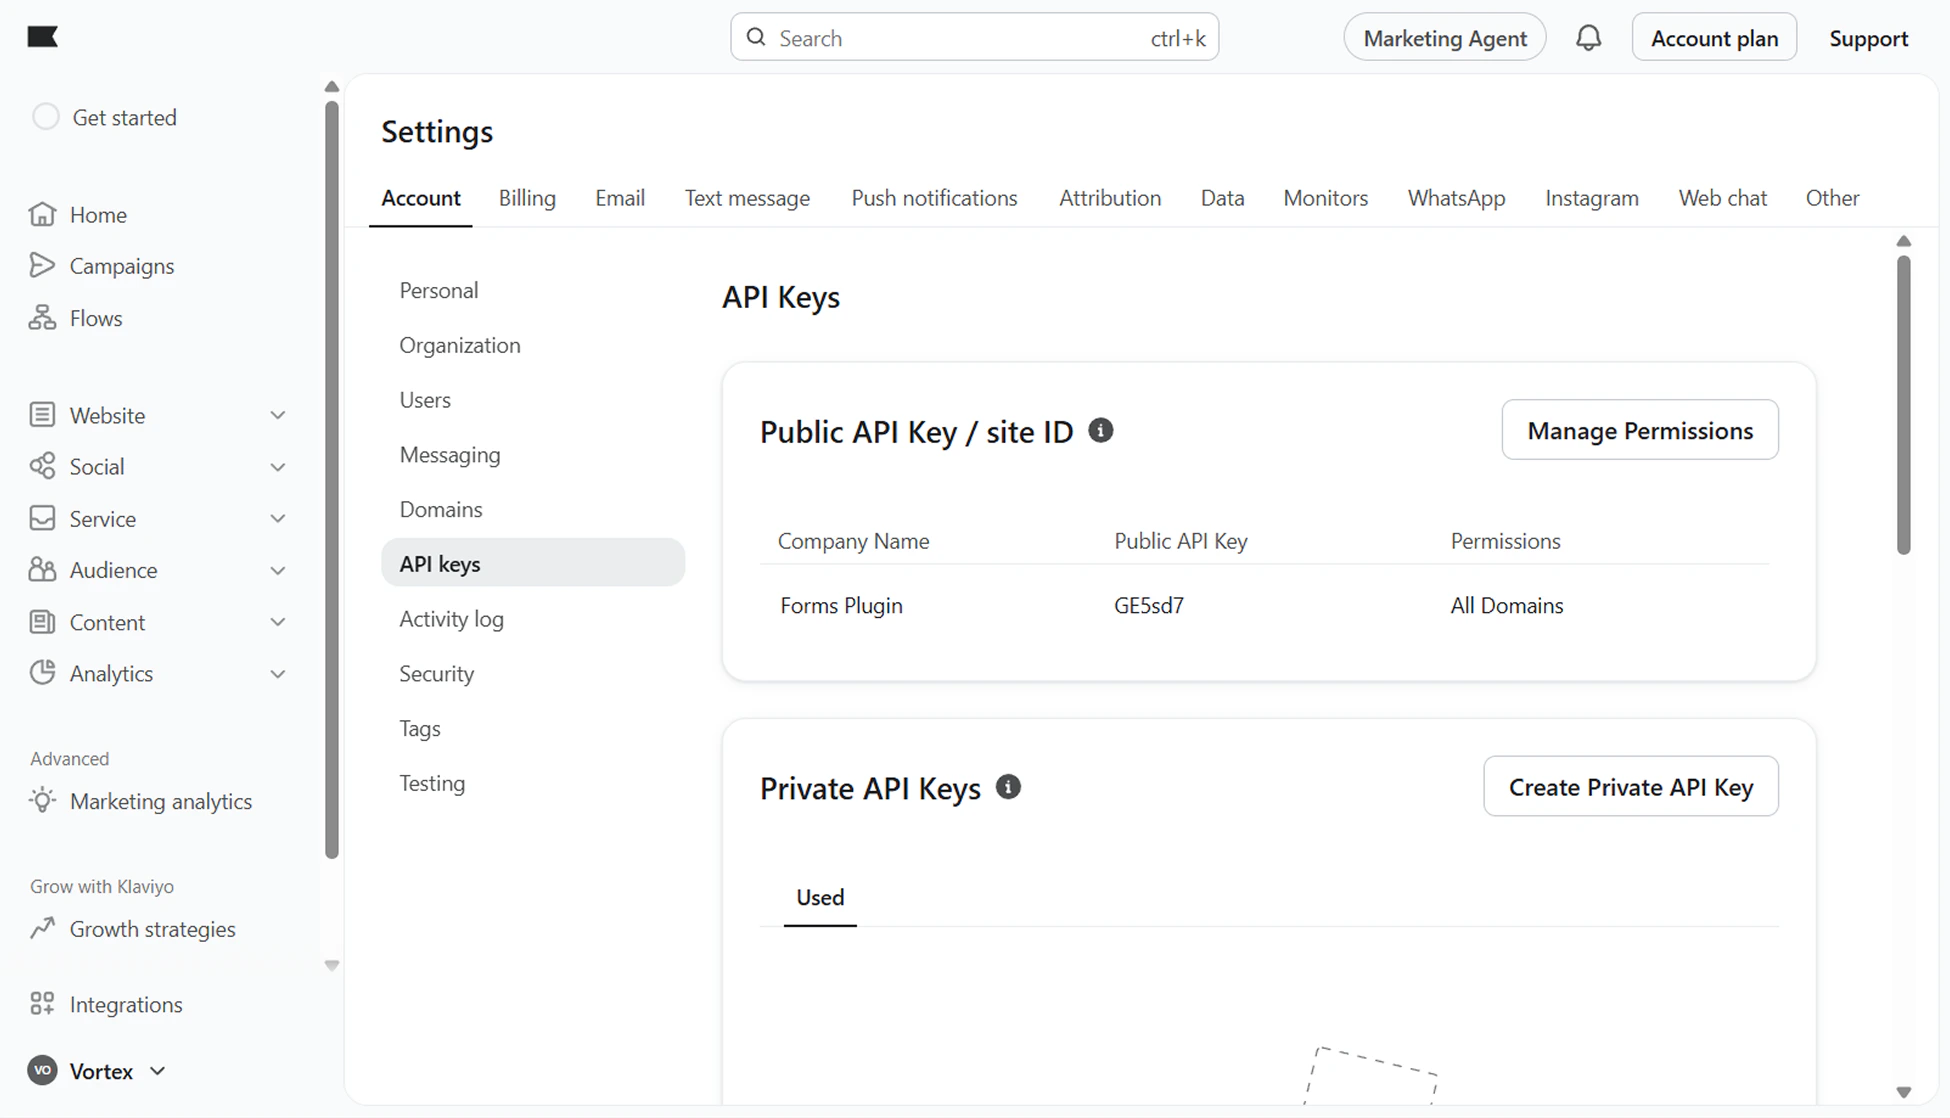 1. Login to your Klaviyo account
2. Navigate to **Settings** → **API Keys**
3. Click **Create Private API Key**
4. Copy the generated API key
Keep your API key in a secure password manager. Never share it publicly or commit it to a code repository.
***
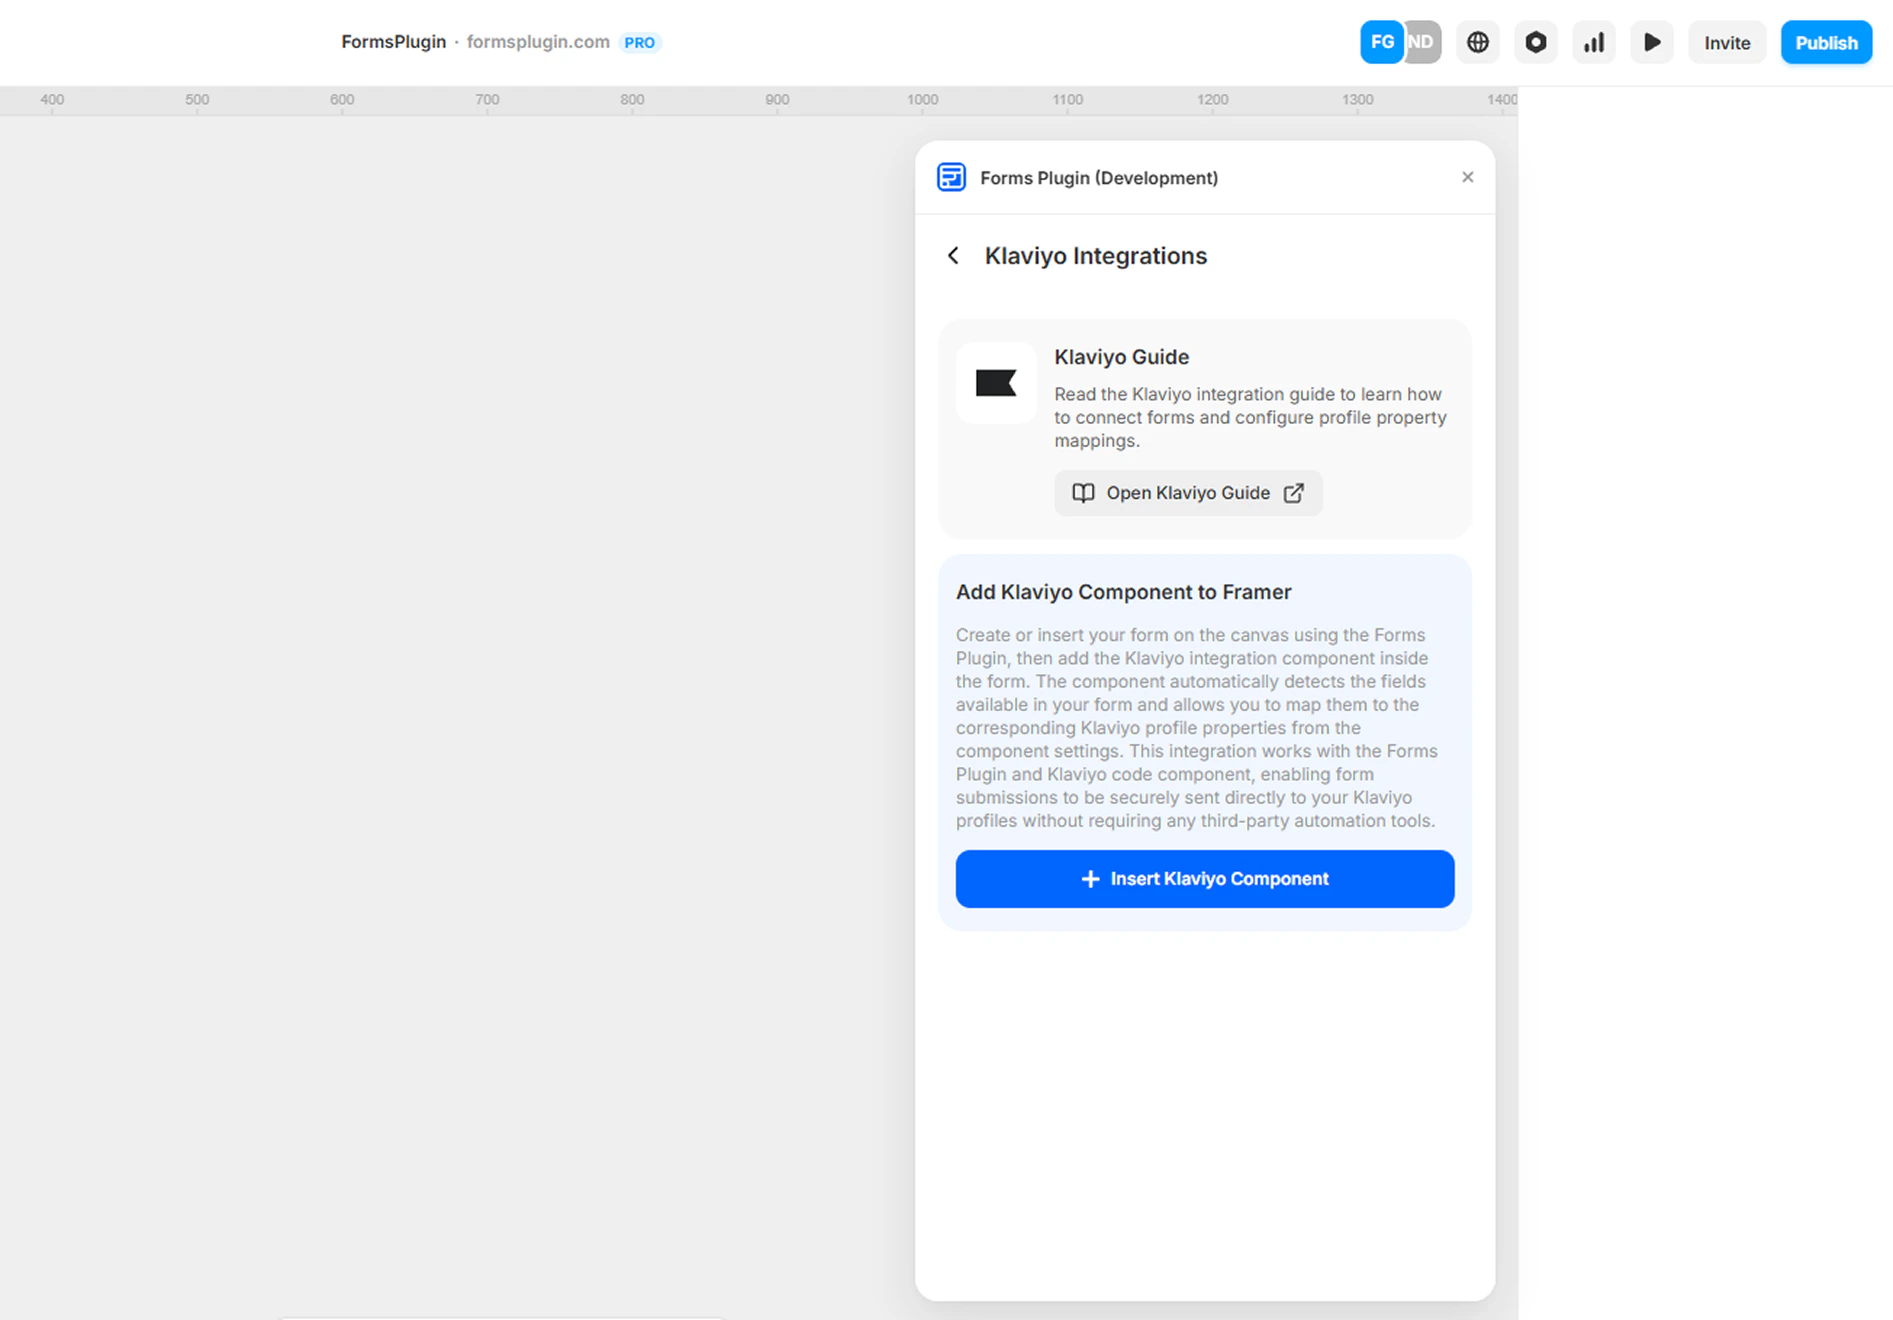
## Step 2 - Insert Klaviyo Component Into Your Form
Select your form in the Framer canvas and insert the Klaviyo component.
The component connects your form to Klaviyo and automatically detects the form fields in your form layout.
1. Login to your Klaviyo account
2. Navigate to **Settings** → **API Keys**
3. Click **Create Private API Key**
4. Copy the generated API key
Keep your API key in a secure password manager. Never share it publicly or commit it to a code repository.
***
## Step 2 - Insert Klaviyo Component Into Your Form
Select your form in the Framer canvas and insert the Klaviyo component.
The component connects your form to Klaviyo and automatically detects the form fields in your form layout.
 ***
## Step 3 - Configure Klaviyo API Settings
After inserting the Klaviyo component, configure the API settings in the component properties panel.
***
## Step 3 - Configure Klaviyo API Settings
After inserting the Klaviyo component, configure the API settings in the component properties panel.
 1. Select the **Klaviyo Integration** component in your form
2. Open the properties panel on the right side
3. Paste your **Klaviyo API Key**
4. (Optional) Enter a **List ID** to automatically add submitted profiles to a specific Klaviyo list
5. Choose whether to **Update Existing** profiles if the email already exists in your Klaviyo account
### Required Fields
* **API Key** - Paste the Klaviyo Private API key (starts with `pk_...`) generated from your Klaviyo account.
### Optional Fields
* **List ID** - Enter a Klaviyo List ID (6 chars, e.g. `XaB1Cd`) to automatically subscribe submitted profiles to that list. Leave this empty to create profiles without list subscription.
* **Update Existing** - When set to **Yes**, existing profiles will be updated if the submitted email already exists in Klaviyo. Set to **No** to skip updates and only create new profiles.
You can find your List ID in Klaviyo under **Audience** → **Lists & Segments**. Open the list you want to use and copy the List ID from the list settings page.
***
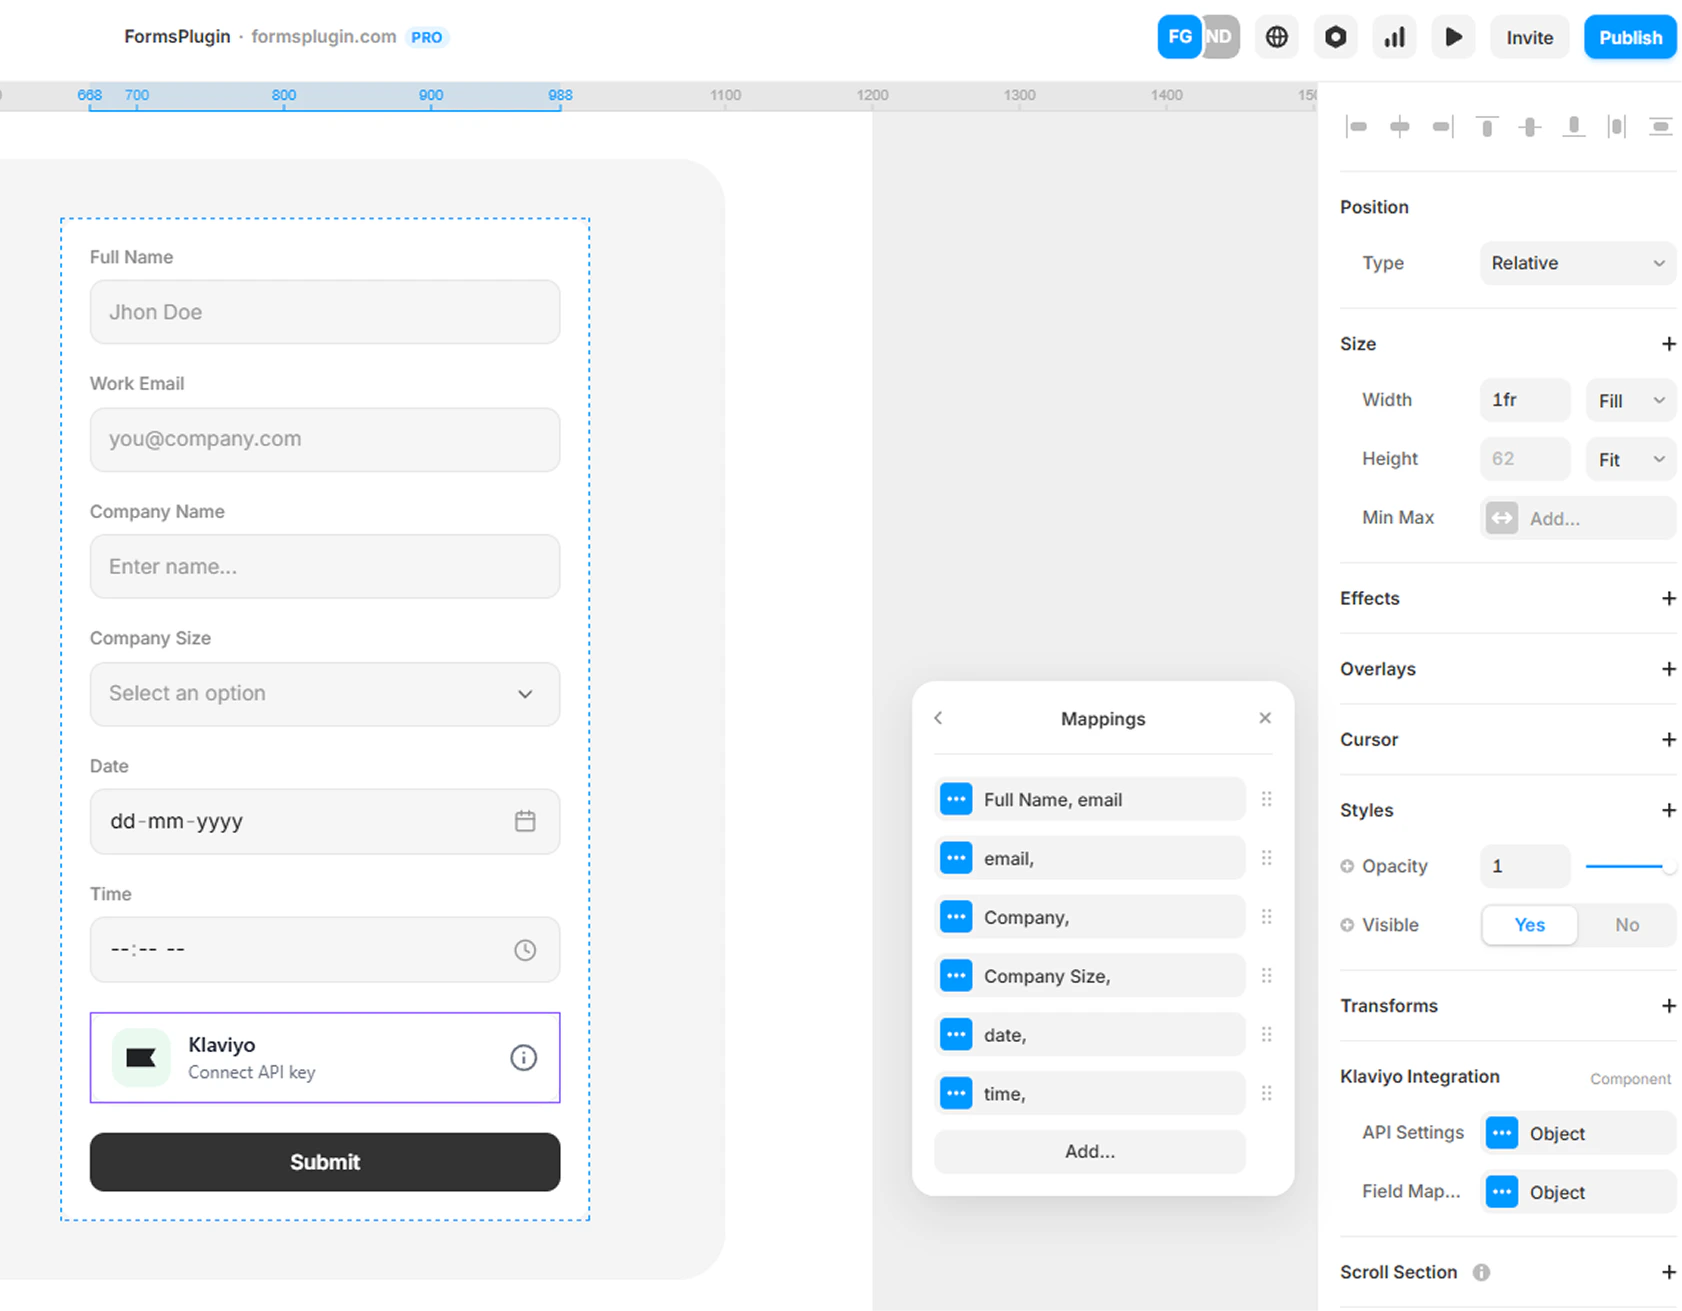
## Step 4 - Configure Field Mapping
Map your form fields to Klaviyo profile properties.
The component automatically detects your form field names. You simply connect each field to the correct Klaviyo property.
1. Select the **Klaviyo Integration** component in your form
2. Open the properties panel on the right side
3. Paste your **Klaviyo API Key**
4. (Optional) Enter a **List ID** to automatically add submitted profiles to a specific Klaviyo list
5. Choose whether to **Update Existing** profiles if the email already exists in your Klaviyo account
### Required Fields
* **API Key** - Paste the Klaviyo Private API key (starts with `pk_...`) generated from your Klaviyo account.
### Optional Fields
* **List ID** - Enter a Klaviyo List ID (6 chars, e.g. `XaB1Cd`) to automatically subscribe submitted profiles to that list. Leave this empty to create profiles without list subscription.
* **Update Existing** - When set to **Yes**, existing profiles will be updated if the submitted email already exists in Klaviyo. Set to **No** to skip updates and only create new profiles.
You can find your List ID in Klaviyo under **Audience** → **Lists & Segments**. Open the list you want to use and copy the List ID from the list settings page.
***
## Step 4 - Configure Field Mapping
Map your form fields to Klaviyo profile properties.
The component automatically detects your form field names. You simply connect each field to the correct Klaviyo property.
 ### Example Mapping
| Form Field | Klaviyo Property |
| ---------- | ---------------- |
| email | email |
| firstname | first\_name |
| lastname | last\_name |
***
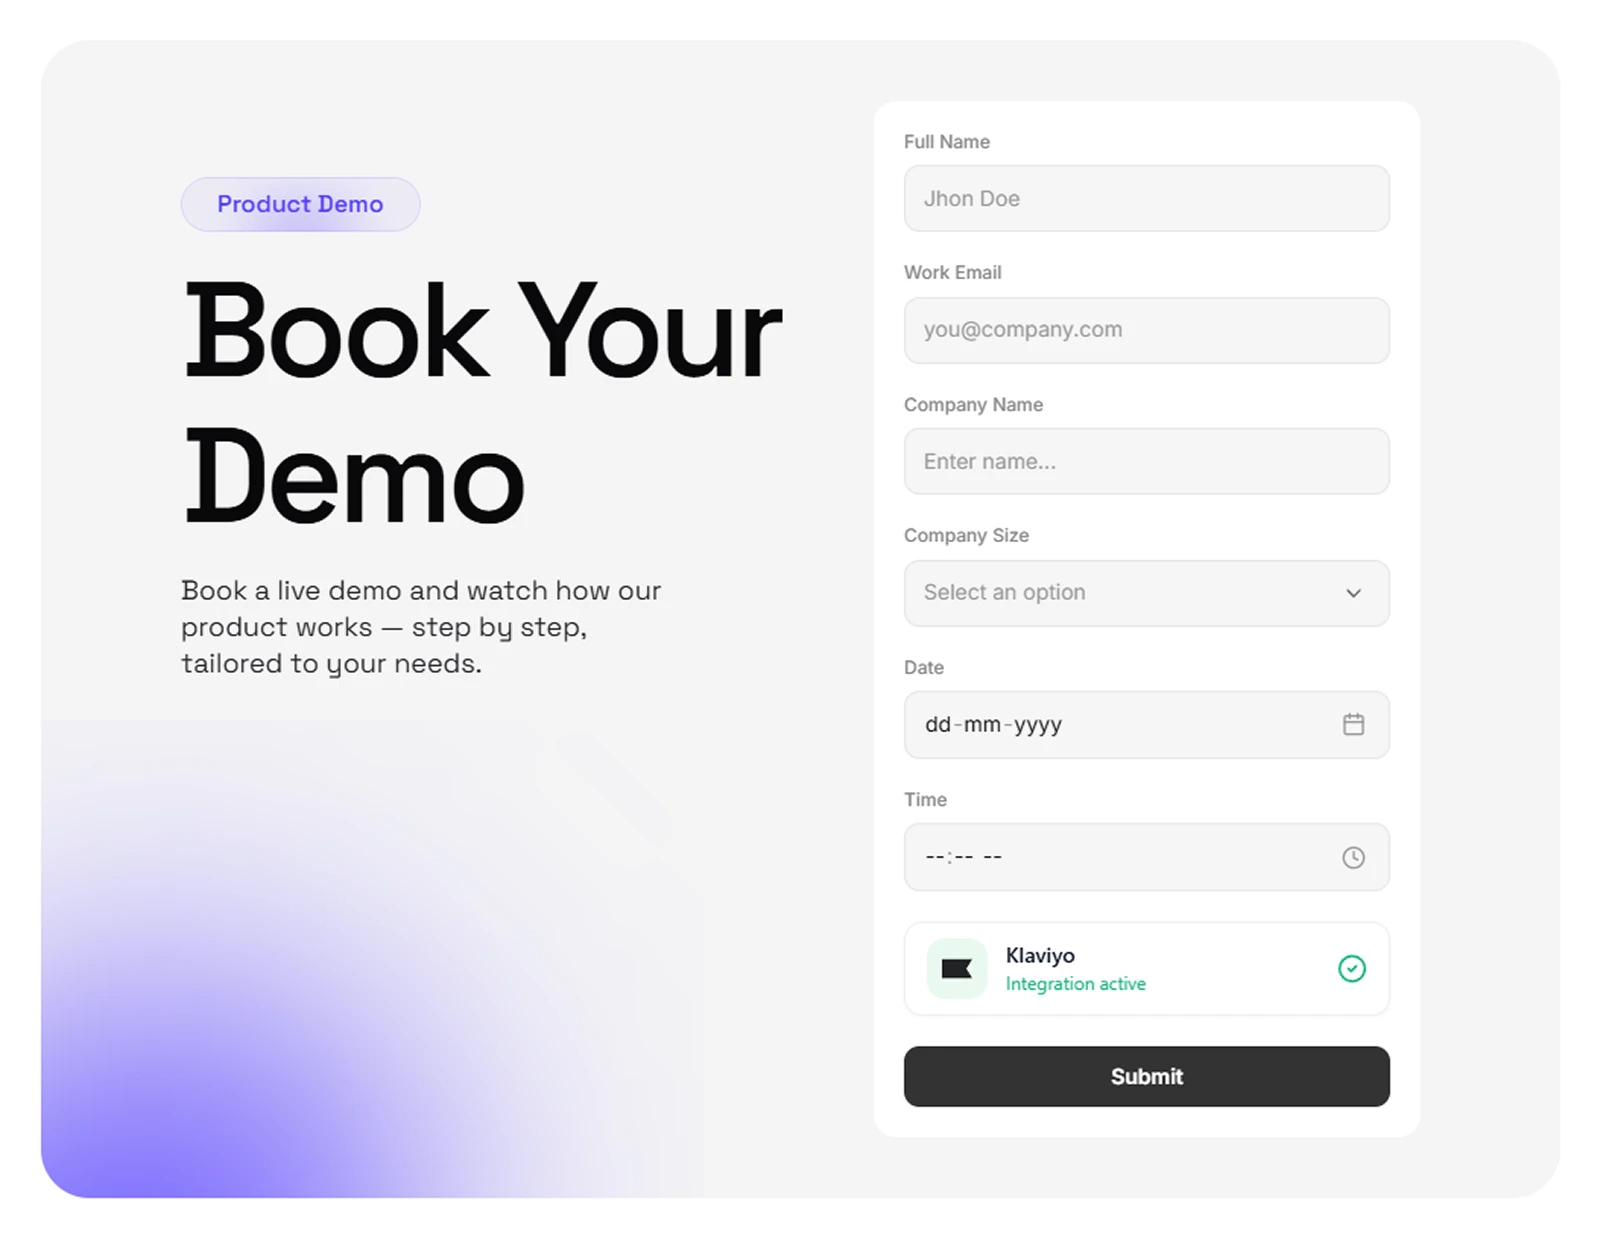
## Step 5 - Result
When a user submits the form, their details will automatically be added as a profile in Klaviyo. You can verify new profiles in your [Klaviyo Profiles dashboard](https://www.klaviyo.com/profiles).
### Example Mapping
| Form Field | Klaviyo Property |
| ---------- | ---------------- |
| email | email |
| firstname | first\_name |
| lastname | last\_name |
***
## Step 5 - Result
When a user submits the form, their details will automatically be added as a profile in Klaviyo. You can verify new profiles in your [Klaviyo Profiles dashboard](https://www.klaviyo.com/profiles).
 ## Next Steps
* [Integrations Overview](/integrations/overview)
* [Contact Support](https://go.formsplugin.com/contact) if you need help
## Next Steps
* [Integrations Overview](/integrations/overview)
* [Contact Support](https://go.formsplugin.com/contact) if you need help