> ## Documentation Index
> Fetch the complete documentation index at: https://formsplugin.com/docs/llms.txt
> Use this file to discover all available pages before exploring further.
# HubSpot
> Connect HubSpot with Framer Forms using the Forms Plugin to automatically create or update contacts from form submissions.
# Connect HubSpot with Framer Forms
Capture leads from your Framer forms and automatically create or update contacts in HubSpot using the Forms Plugin.
***
## Step 1 - Create a Legacy Private App and Get the Access Token
Before connecting HubSpot to your form, create a Legacy Private App in your HubSpot account to generate an Access Token. This token allows the Forms Plugin to securely send form submissions to HubSpot.
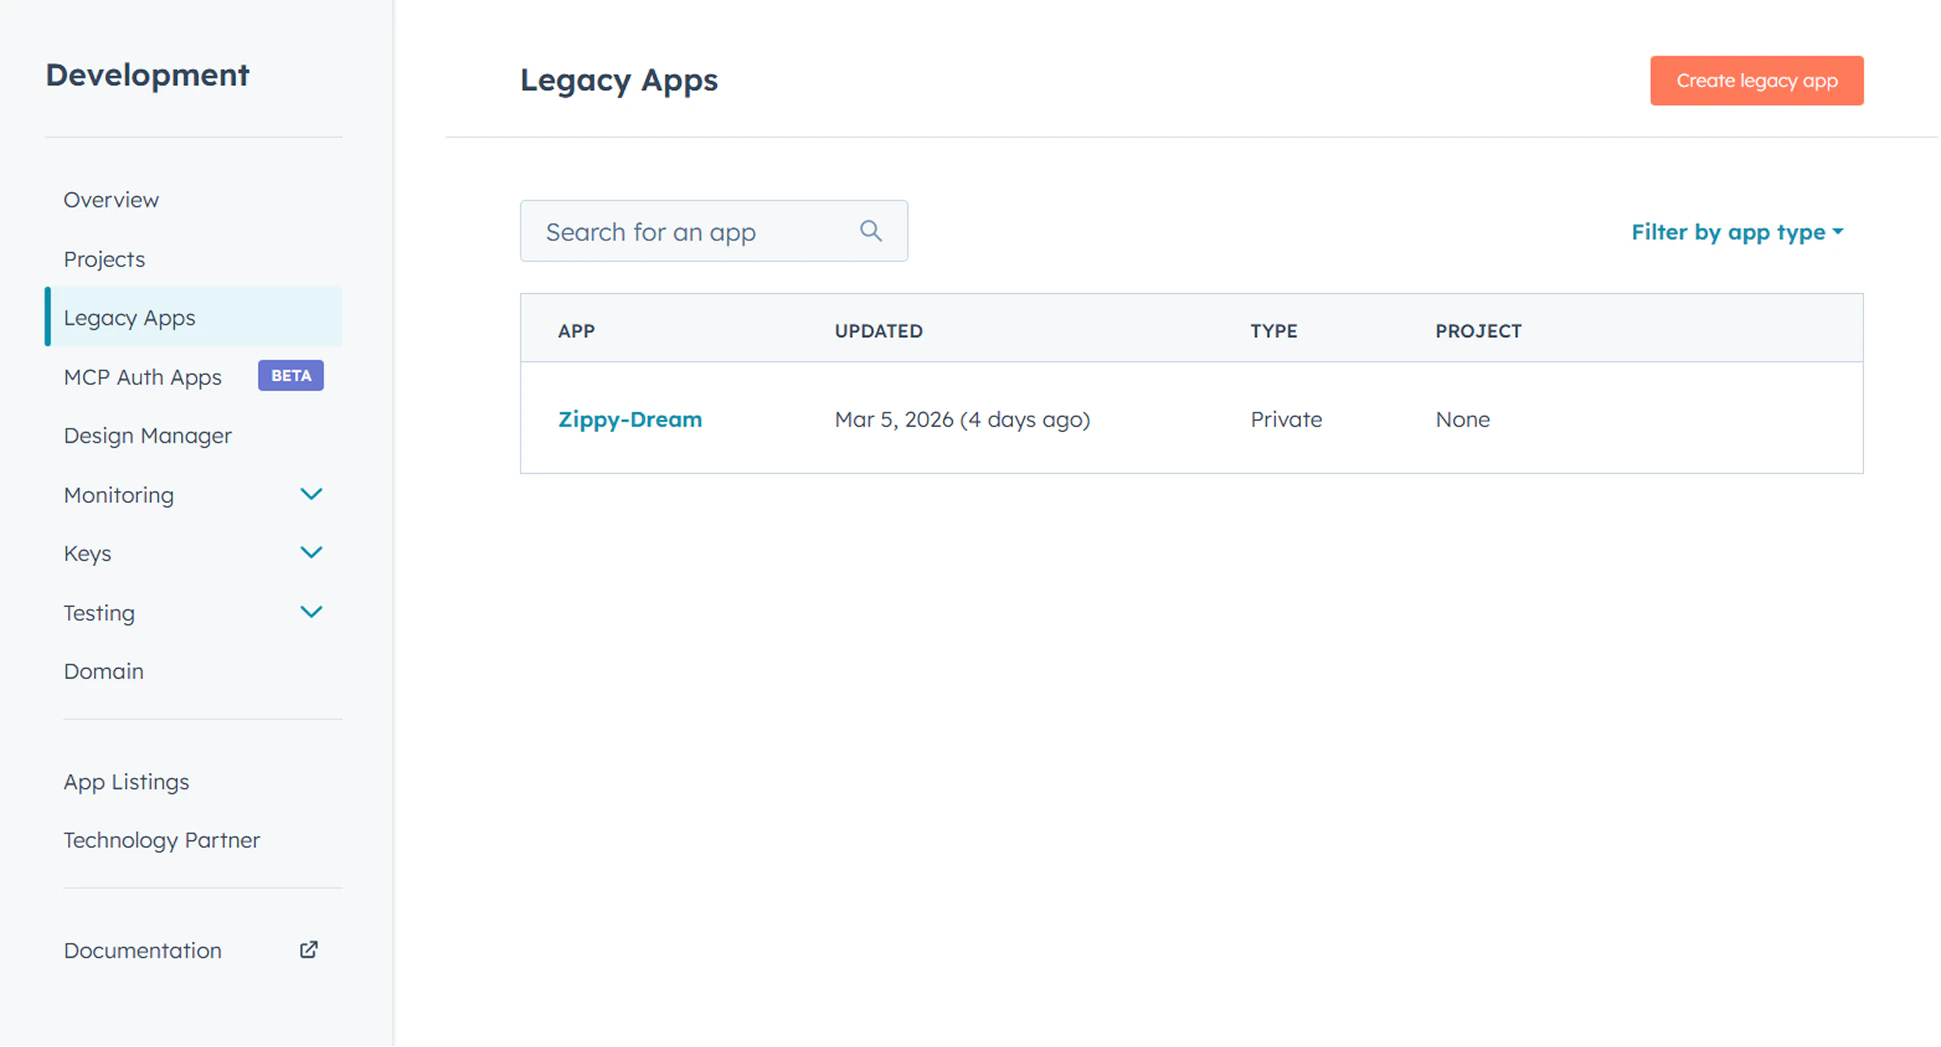 1. Login to your HubSpot account
2. Navigate to **Settings** → **Integrations** → **Private Apps**
3. Click **Create a private app**
4. Give your app a name (e.g., "Forms Plugin")
5. Under **Scopes**, add the required CRM permissions (see below)
6. Click **Create app**
7. Copy the generated **Access Token**
### Required Scopes
The plugin needs read and write access so it can create new records and update existing ones. Add the following scopes to your Private App:
| Scope | Purpose |
| ---------------------------- | -------------------------------------- |
| `crm.objects.contacts.read` | Check whether a contact already exists |
| `crm.objects.contacts.write` | Create and update contacts |
If you also want to create **Leads** from your form submissions (see Step 5), add these two scopes as well:
| Scope | Purpose |
| ------------------------- | ---------------------------------- |
| `crm.objects.leads.read` | Check existing lead records |
| `crm.objects.leads.write` | Create leads linked to the contact |
Lead creation requires **Sales Hub Professional or Enterprise**. Without the `crm.objects.leads.write` scope, the integration will only create or update contacts and lead creation will fail.
### Already Have a Private App?
If you already created a Private App earlier, you don't need to create a new one. Just add the missing scopes to it:
1. Go to **Settings** → **Integrations** → **Private Apps**
2. Open the connected app and click **Edit**
3. Open the **Scopes** tab and add the four scopes listed above
4. Click **Save**
After changing scopes, HubSpot may generate a new **Access Token**. If the token changes, paste the new token into the component's API Settings, otherwise the old token will not work with the new permissions.
Keep your Access Token in a secure password manager. Never share it publicly or commit it to a code repository.
***
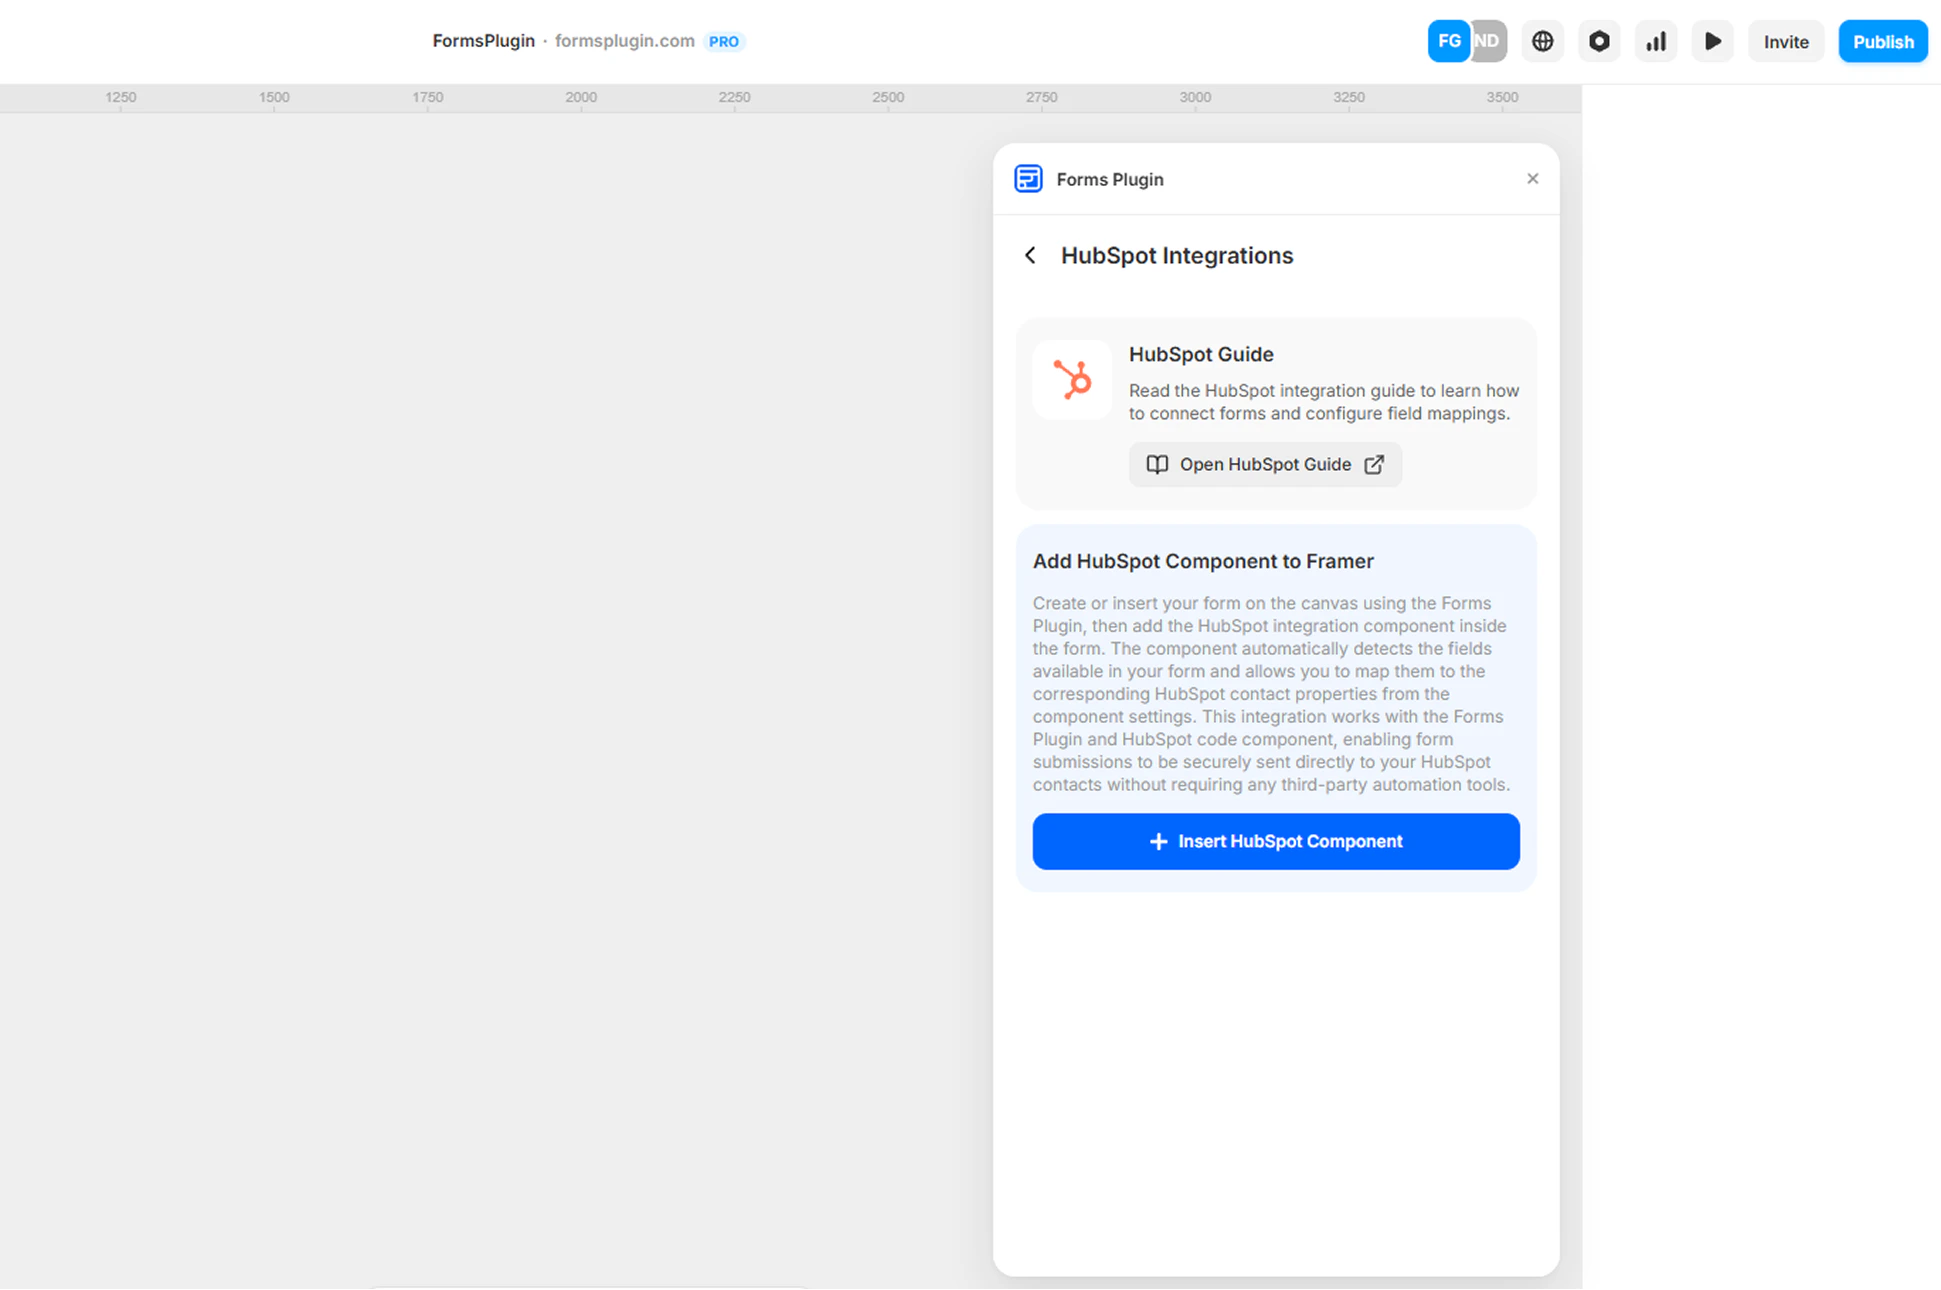
## Step 2 - Insert HubSpot Component Into Your Form
Select your form in the Framer canvas and insert the HubSpot component.
The component connects your form to HubSpot and automatically detects the form fields in your form layout.
1. Login to your HubSpot account
2. Navigate to **Settings** → **Integrations** → **Private Apps**
3. Click **Create a private app**
4. Give your app a name (e.g., "Forms Plugin")
5. Under **Scopes**, add the required CRM permissions (see below)
6. Click **Create app**
7. Copy the generated **Access Token**
### Required Scopes
The plugin needs read and write access so it can create new records and update existing ones. Add the following scopes to your Private App:
| Scope | Purpose |
| ---------------------------- | -------------------------------------- |
| `crm.objects.contacts.read` | Check whether a contact already exists |
| `crm.objects.contacts.write` | Create and update contacts |
If you also want to create **Leads** from your form submissions (see Step 5), add these two scopes as well:
| Scope | Purpose |
| ------------------------- | ---------------------------------- |
| `crm.objects.leads.read` | Check existing lead records |
| `crm.objects.leads.write` | Create leads linked to the contact |
Lead creation requires **Sales Hub Professional or Enterprise**. Without the `crm.objects.leads.write` scope, the integration will only create or update contacts and lead creation will fail.
### Already Have a Private App?
If you already created a Private App earlier, you don't need to create a new one. Just add the missing scopes to it:
1. Go to **Settings** → **Integrations** → **Private Apps**
2. Open the connected app and click **Edit**
3. Open the **Scopes** tab and add the four scopes listed above
4. Click **Save**
After changing scopes, HubSpot may generate a new **Access Token**. If the token changes, paste the new token into the component's API Settings, otherwise the old token will not work with the new permissions.
Keep your Access Token in a secure password manager. Never share it publicly or commit it to a code repository.
***
## Step 2 - Insert HubSpot Component Into Your Form
Select your form in the Framer canvas and insert the HubSpot component.
The component connects your form to HubSpot and automatically detects the form fields in your form layout.
 ***
## Step 3 - Configure HubSpot Access Token Settings
After inserting the HubSpot component, configure the Access Token settings in the component properties panel.
***
## Step 3 - Configure HubSpot Access Token Settings
After inserting the HubSpot component, configure the Access Token settings in the component properties panel.
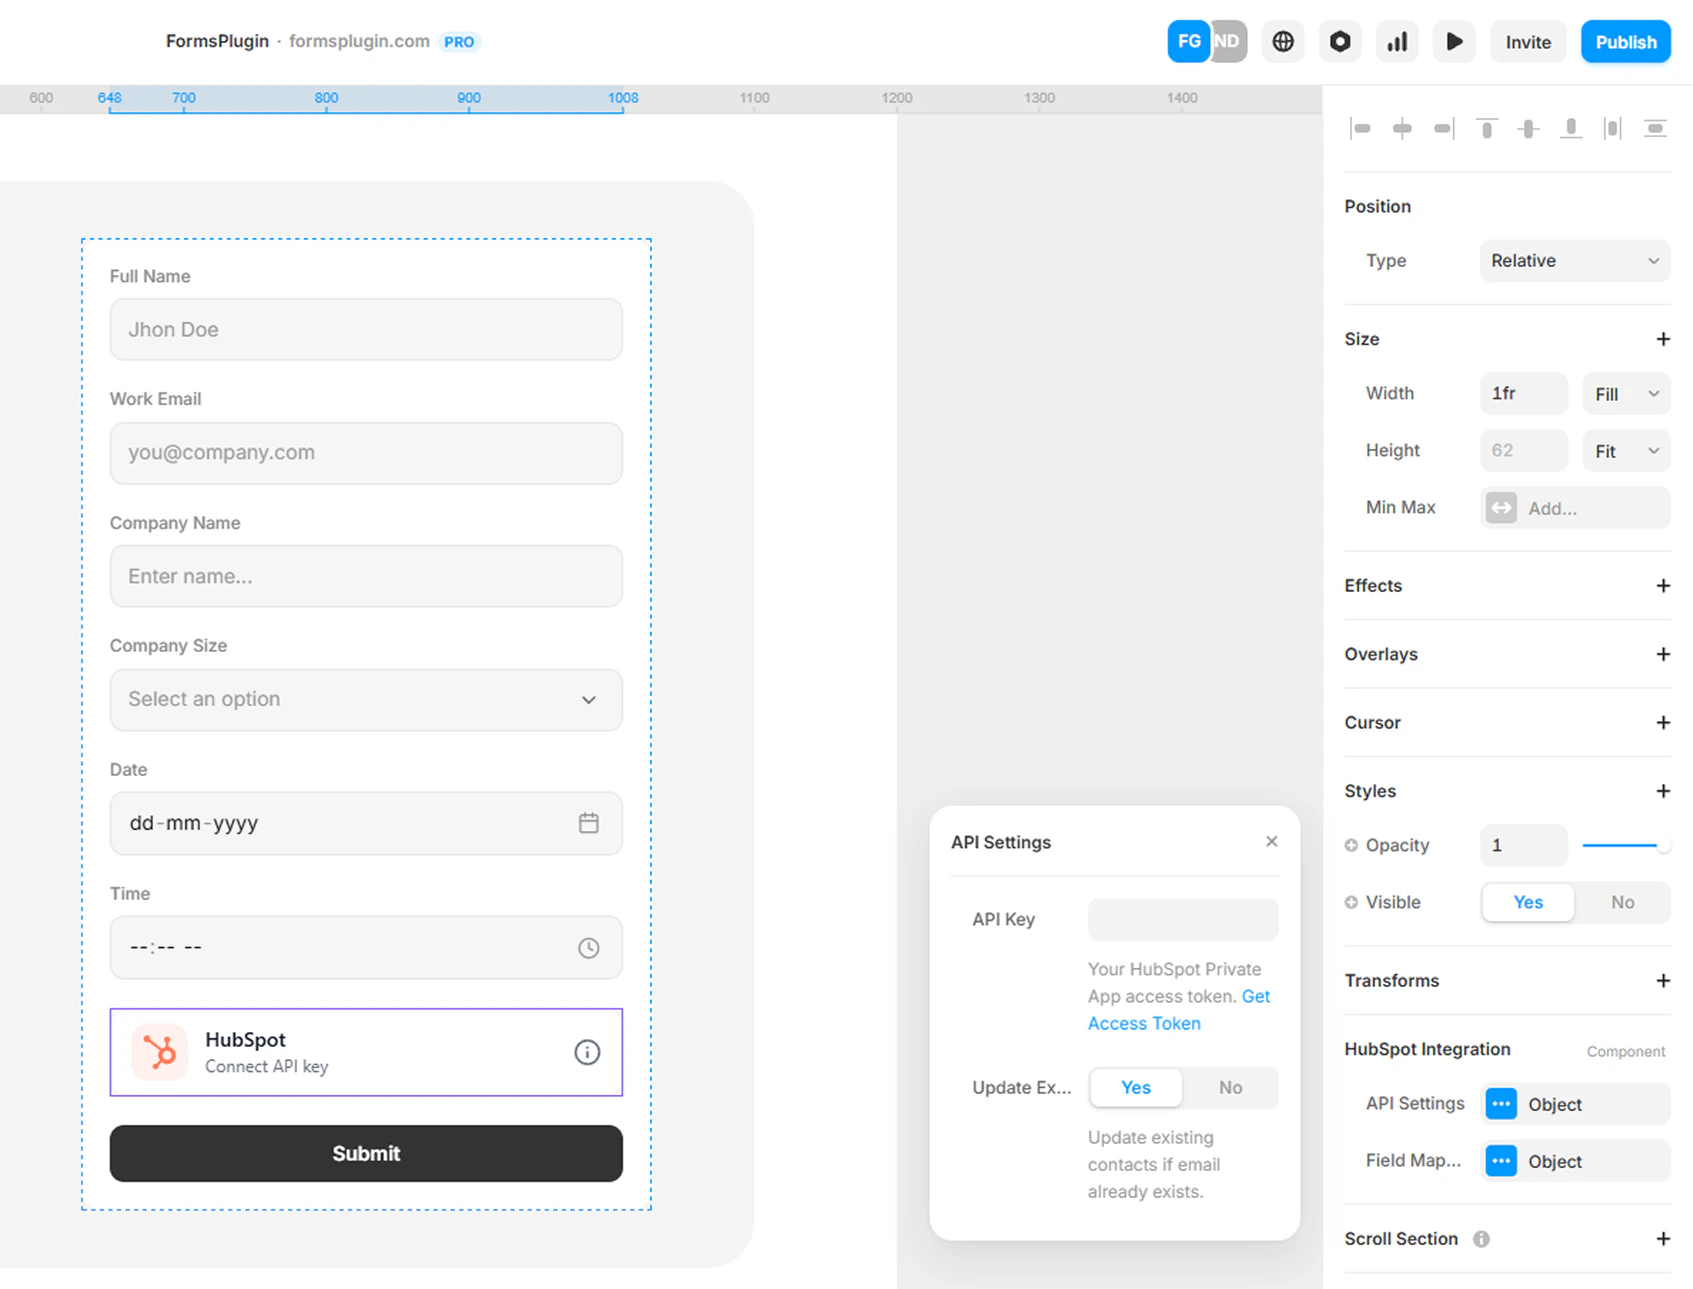 1. Select the **HubSpot Integration** component in your form
2. Open the properties panel on the right side
3. Paste your **HubSpot Access Token**
### Required Fields
* **HubSpot Access Token** - Paste the Access Token generated from your HubSpot Legacy Private App.
### Optional Fields
* **Update Existing** - When set to **Yes** (default), existing contacts are updated if the submitted email already exists. Set to **No** to only create new contacts.
***
## Step 4 - Configure Field Mapping
Map your form fields to HubSpot contact properties.
The component automatically detects your form field names. You simply connect each field to the correct HubSpot contact property.
1. Select the **HubSpot Integration** component in your form
2. Open the properties panel on the right side
3. Paste your **HubSpot Access Token**
### Required Fields
* **HubSpot Access Token** - Paste the Access Token generated from your HubSpot Legacy Private App.
### Optional Fields
* **Update Existing** - When set to **Yes** (default), existing contacts are updated if the submitted email already exists. Set to **No** to only create new contacts.
***
## Step 4 - Configure Field Mapping
Map your form fields to HubSpot contact properties.
The component automatically detects your form field names. You simply connect each field to the correct HubSpot contact property.
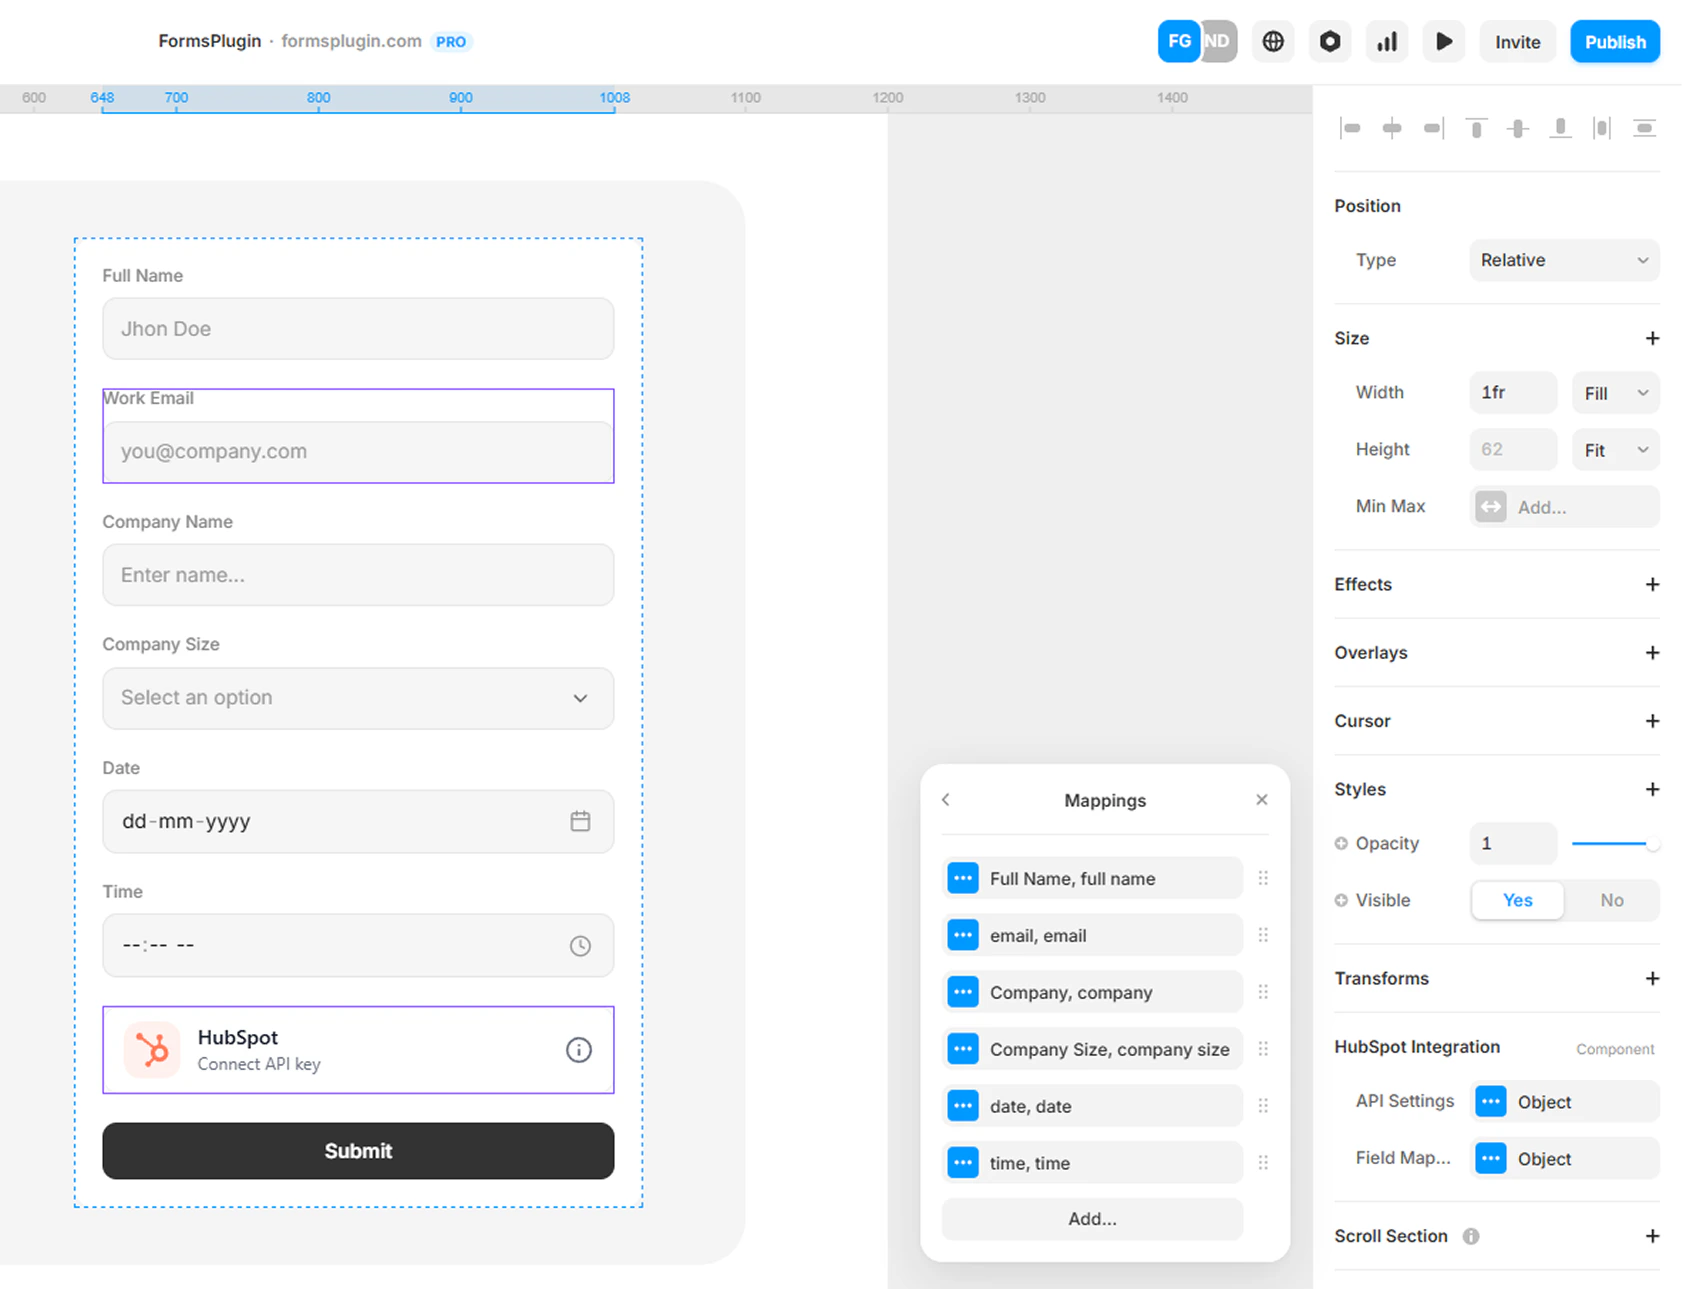 ### Example Mapping
| Form Field | HubSpot Property |
| ---------- | ---------------- |
| email | email |
| name | firstname |
| phone | phone |
| company | company |
***
## Step 5 - Create Leads (Optional)
In addition to contacts, the integration can also create a HubSpot **Lead** linked to the contact on each submission. This is useful when you want submissions to flow into your Sales Hub lead pipeline, not just your contacts list.
Lead creation requires **Sales Hub Professional or Enterprise** and the `crm.objects.leads.write` scope on your Private App token (see Step 1).
To enable it, select the **HubSpot Integration** component, open the **Lead Settings** section in the properties panel, and turn **Create Lead** to **Yes**. The following options become available:
* **Create Lead** - Set to **Yes** to also create a Lead linked to the contact. Defaults to **No**, so existing setups keep contact-only behavior.
* **Lead Name** - Template for the lead name. Wrap form field names in `{}` to substitute their value at submit, for example `{fullName}_{utm_source}`. You can mix literal text freely. Leave empty to use the contact's email as the lead name.
* **Lead Type** - Choose **New Business**, **Existing Business**, or **Custom** to enter any other `hs_lead_type` value defined in your HubSpot account.
* **Lead Label** - Optional label for the lead, such as `WARM`, `HOT`, or `COLD`.
* **Pipeline Stage** - Optional pipeline stage. Use the stage's internal name from your HubSpot Lead pipeline.
* **Lead Mappings** - Map additional form fields to HubSpot lead properties. Choose **Custom** to enter any internal property name (e.g. `message_from_lead`).
Field names in the Lead Name template and Lead Mappings are matched case-insensitively against your form field `name` attributes.
***
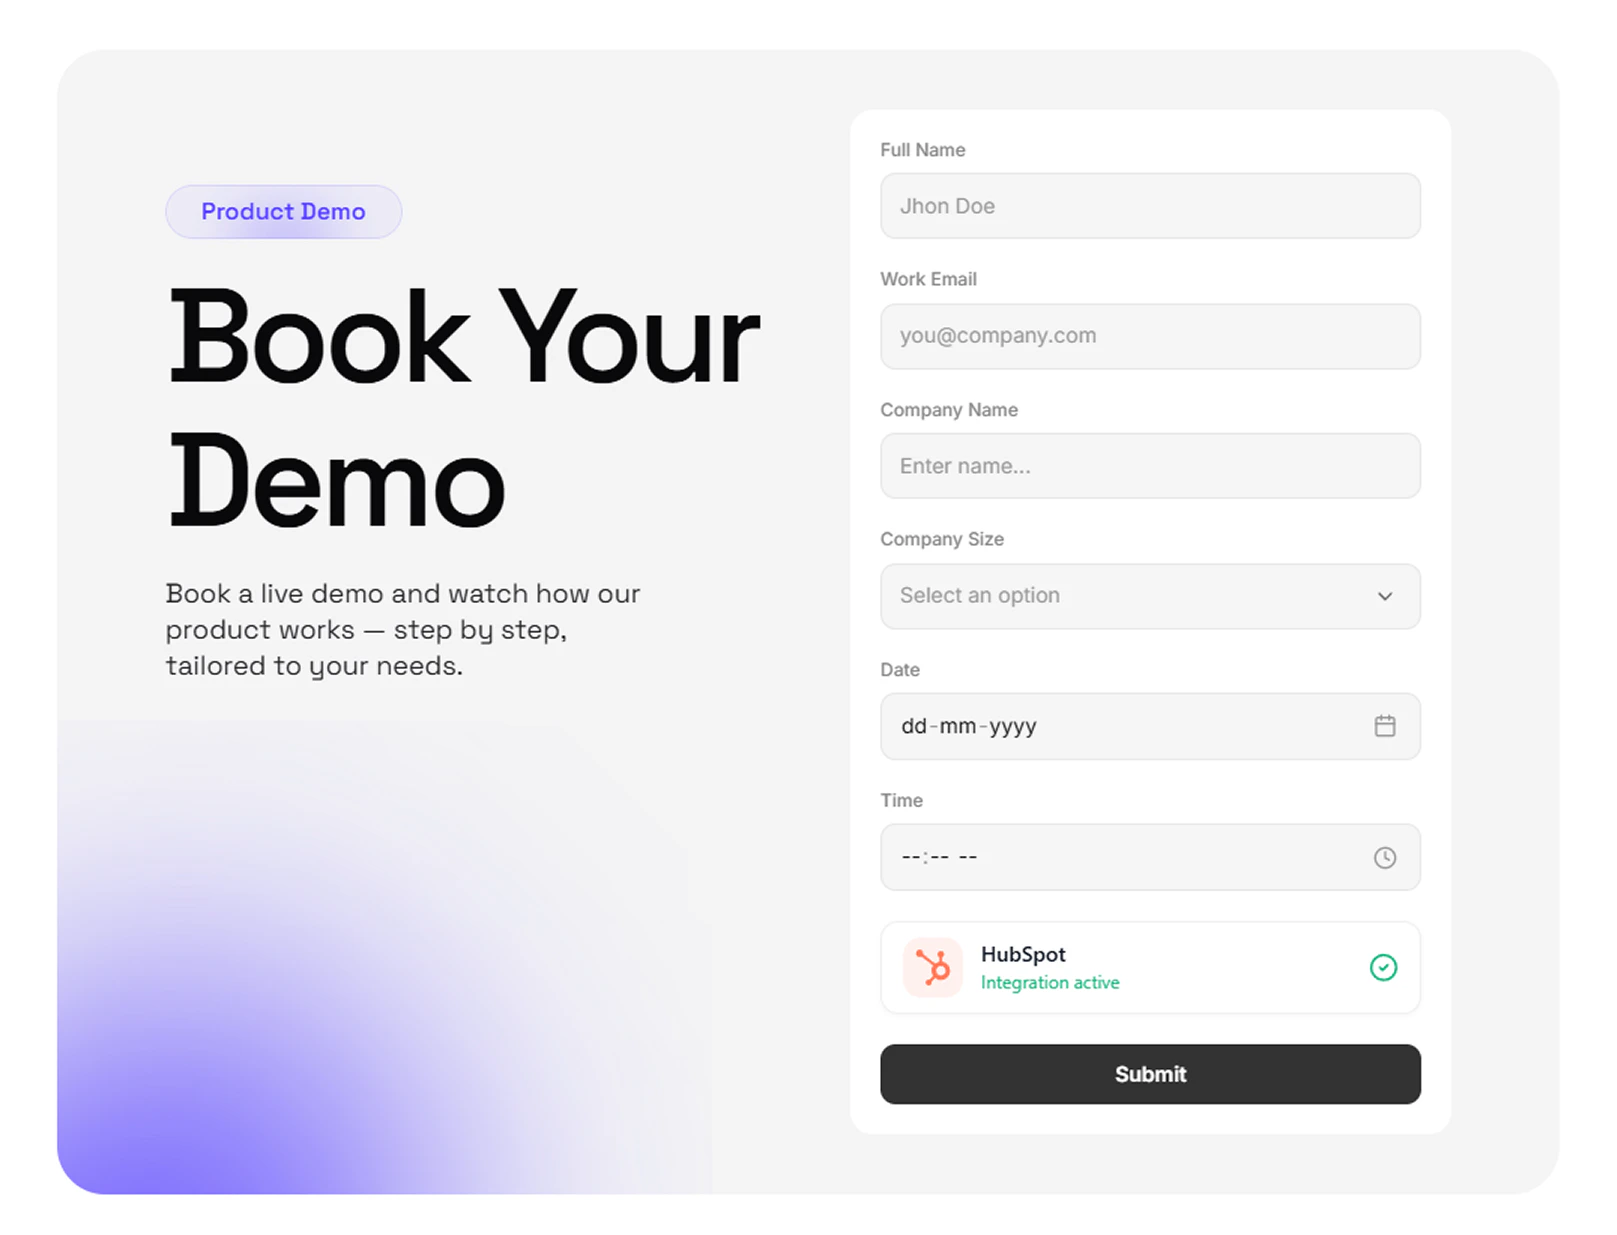
## Step 6 - Result
When a user submits the form, their details will automatically be created or updated as a contact in HubSpot. If **Create Lead** is enabled, a linked Lead is created as well. You can then manage contacts and leads, set up workflows, and trigger automations directly from HubSpot.
### Example Mapping
| Form Field | HubSpot Property |
| ---------- | ---------------- |
| email | email |
| name | firstname |
| phone | phone |
| company | company |
***
## Step 5 - Create Leads (Optional)
In addition to contacts, the integration can also create a HubSpot **Lead** linked to the contact on each submission. This is useful when you want submissions to flow into your Sales Hub lead pipeline, not just your contacts list.
Lead creation requires **Sales Hub Professional or Enterprise** and the `crm.objects.leads.write` scope on your Private App token (see Step 1).
To enable it, select the **HubSpot Integration** component, open the **Lead Settings** section in the properties panel, and turn **Create Lead** to **Yes**. The following options become available:
* **Create Lead** - Set to **Yes** to also create a Lead linked to the contact. Defaults to **No**, so existing setups keep contact-only behavior.
* **Lead Name** - Template for the lead name. Wrap form field names in `{}` to substitute their value at submit, for example `{fullName}_{utm_source}`. You can mix literal text freely. Leave empty to use the contact's email as the lead name.
* **Lead Type** - Choose **New Business**, **Existing Business**, or **Custom** to enter any other `hs_lead_type` value defined in your HubSpot account.
* **Lead Label** - Optional label for the lead, such as `WARM`, `HOT`, or `COLD`.
* **Pipeline Stage** - Optional pipeline stage. Use the stage's internal name from your HubSpot Lead pipeline.
* **Lead Mappings** - Map additional form fields to HubSpot lead properties. Choose **Custom** to enter any internal property name (e.g. `message_from_lead`).
Field names in the Lead Name template and Lead Mappings are matched case-insensitively against your form field `name` attributes.
***
## Step 6 - Result
When a user submits the form, their details will automatically be created or updated as a contact in HubSpot. If **Create Lead** is enabled, a linked Lead is created as well. You can then manage contacts and leads, set up workflows, and trigger automations directly from HubSpot.
 ## Next Steps
* [Integrations Overview](/integrations/overview)
* [Contact Support](https://go.formsplugin.com/contact) if you need help
## Next Steps
* [Integrations Overview](/integrations/overview)
* [Contact Support](https://go.formsplugin.com/contact) if you need help